Organize and share your data
1. Creating and modifying a sphere
What is a sphere?
A sphere is a collection of photos/doc/video that you want to aggregate under a sphere/album. You will then be able to share this sphere/album with whomever you want.
IN THE WEB APPLICATION:
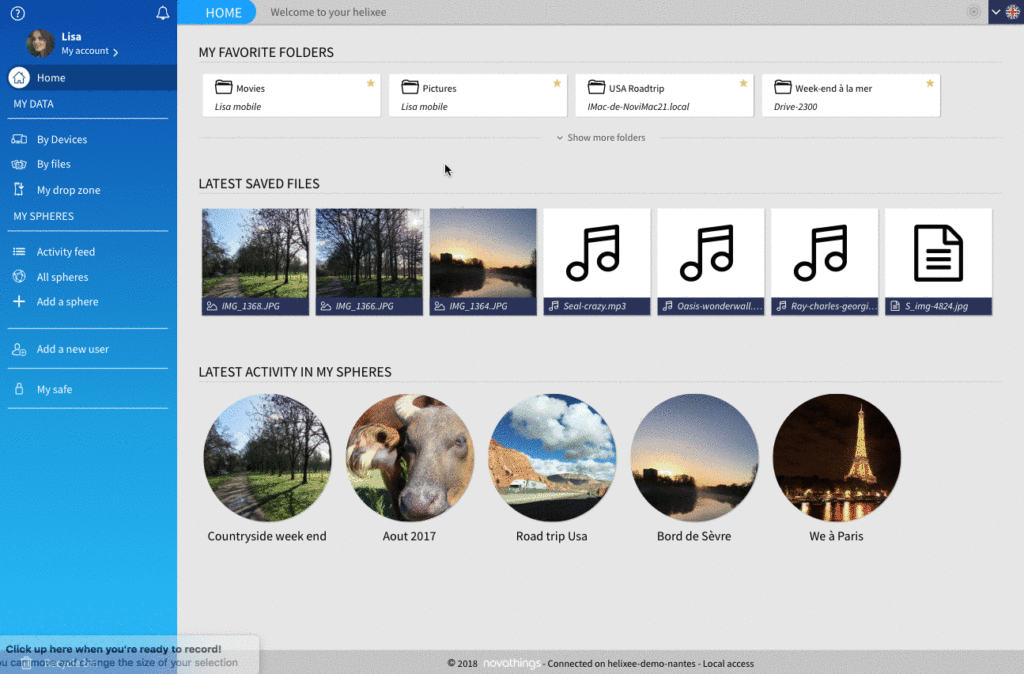
On the homepage of the my.helixee.me platform, the section « Latest activity in my spheres » shows the last spheres you created or modified. You will find quick access to the sharing features on the left menu.
The « My Spheres » section in the side menu allows you to do this:
- Access a chronological view of the activity of the spheres with the Activity feed.
- View all your shared files by clicking on All your spheres.
- To create a new sphere, by clicking on the button Add a sphere.
To create a sphere:
- In the left menu, in the « My Sphere » section, click on the button Add a sphere.
- A window appears, enter the name of the sphere and click on the Validate button.
To change the name of a sphere:
- Click on at the top right,
- Change the name of your sphere,
- Click on Validate
To modify the content of a sphere:
- Click on your sphere,
- Then on See more at the top right of your sphere
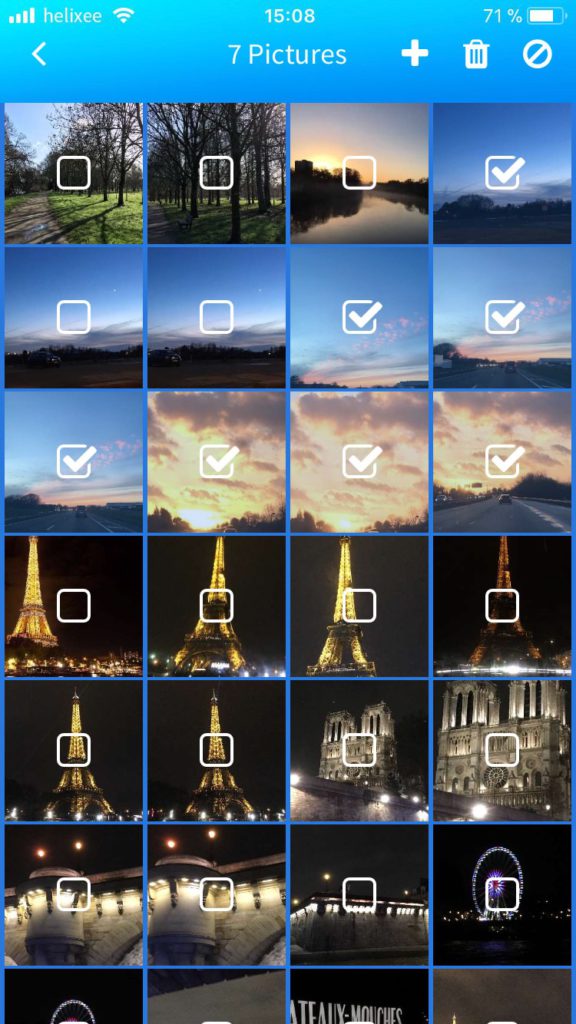
- Click on Select
- And click on the pictures to remove from the sphere.
To delete a sphere:
- Click on your sphere,
- Click on and then on Delete
- You will need to then confirm the Sphere deletion

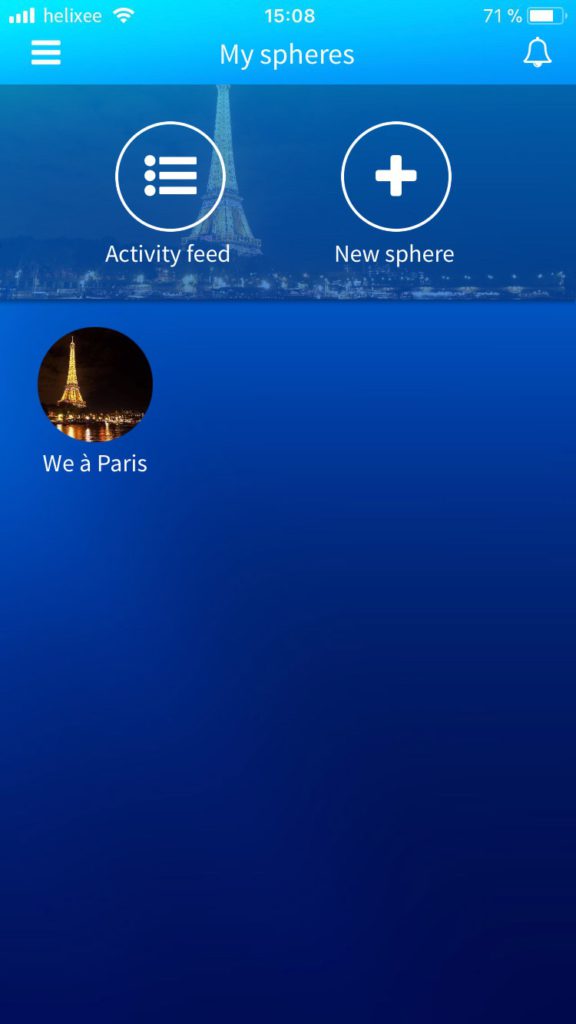
IN THE MOBILE APPLICATION:
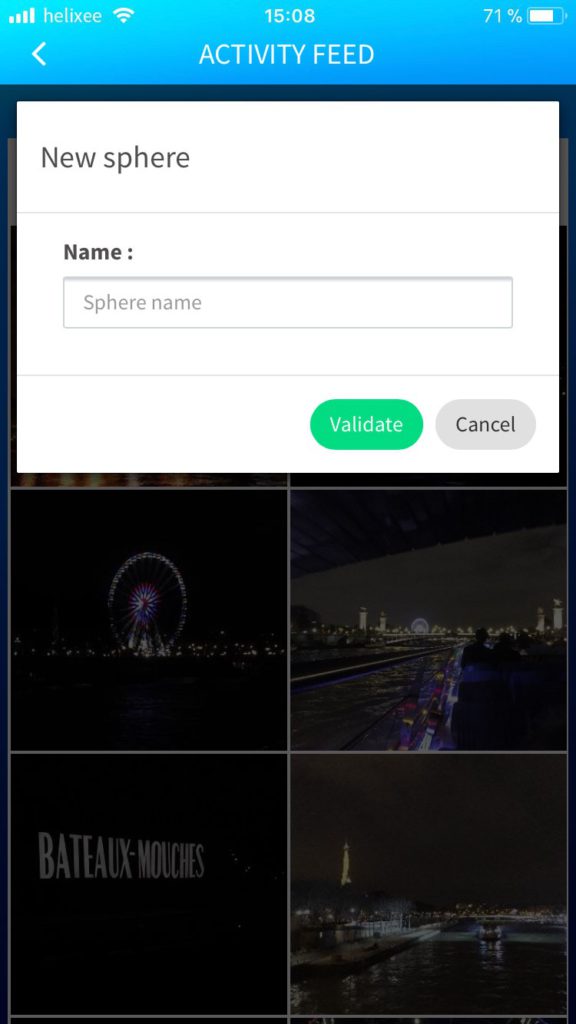
To create a sphere:
- Open the menu and click on My Spheres
- click on the New Sphere button
- Enter the name of the sphere then Validate
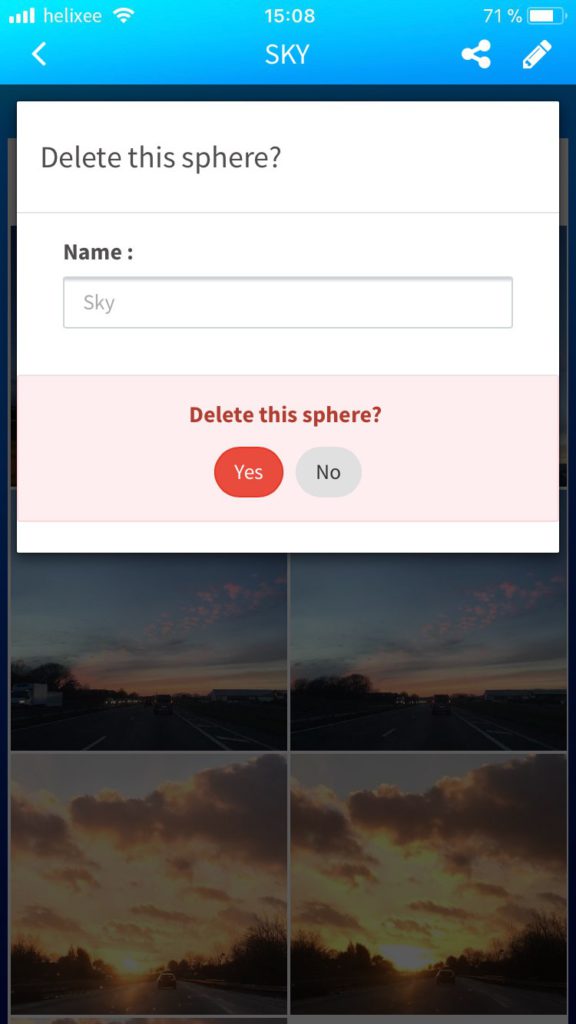
To modify and delete a sphere :
- Click on the sphere and click on .
- You can change the name and Validate or Delete the sphere.

2. Adding and removing files in a sphere
IN THE WEB APPLICATION:
To add files in a sphere:
- Click in the left menu on the category you want to share, for example, »photos » or « videos ».
- Click on the green Select button at the top right
- At this point, you have 2 ways to select your items:
- By date: All items corresponding to a specific date are selected
- One by one: Click on each element you want to incorporate in your sphere
- To add them to a sphere, just click on Add to a sphere.
- A window opens and you can select a sphere that has already been created or create a new one.
- A window appears then, enter the name of the sphere and click on the Confirm button.

IN THE MOBILE APPLICATION:
To add files in a sphere:
-
- Go to My data by clicking on , and choose the file type you want to add in a sphere.
- Click on the icon, check boxes appear on the different files available. Check the ones you want to share in the sphere.
- To add them to a sphere, click on the icon.
-
-
- To add them to an existing sphere, click on the sphere of your choice. A message informs you that the items have been added to the sphere.
- You can, then, either choose View sphere or Continue selection.
-
-
- If you want to add them to New Sphere, click on New Sphere.
- Give your sphere a name and then Create the sphere.
- Click on your newly created sphere: A message informs you that the elements have been added to the sphere.
- You can, then, either choose View sphere or Continue selection.


3. Inviting and deleting users into a sphere
IN THE WEB APPLICATION:
To invite a person to consult your sphere:
- Click in the side menu on All my spheres
- Choose the sphere and open it by clicking on it
- Then click on at the top of your screen
- Choose a person already invited on the helixee by clicking on their name.
- Or add their email address and press Send. Your invitation is sent.
- A green notification will confirm that your invitation has been sent.
To accept an invitation, consult « Accepting an invitation to have access to a helixee ».
To delete a person you invited to your sphere:
- Select the sphere in question.
- Then click on at the top of your screen
- People who have access to your sphere appear in blue.
- To cancel their access to your sphere, press their name, which will then turn white.
- Click on Validate.
- If you want to invite them again, click on their name. It will change to blue again.

IN THE MOBILE APPLICATION:
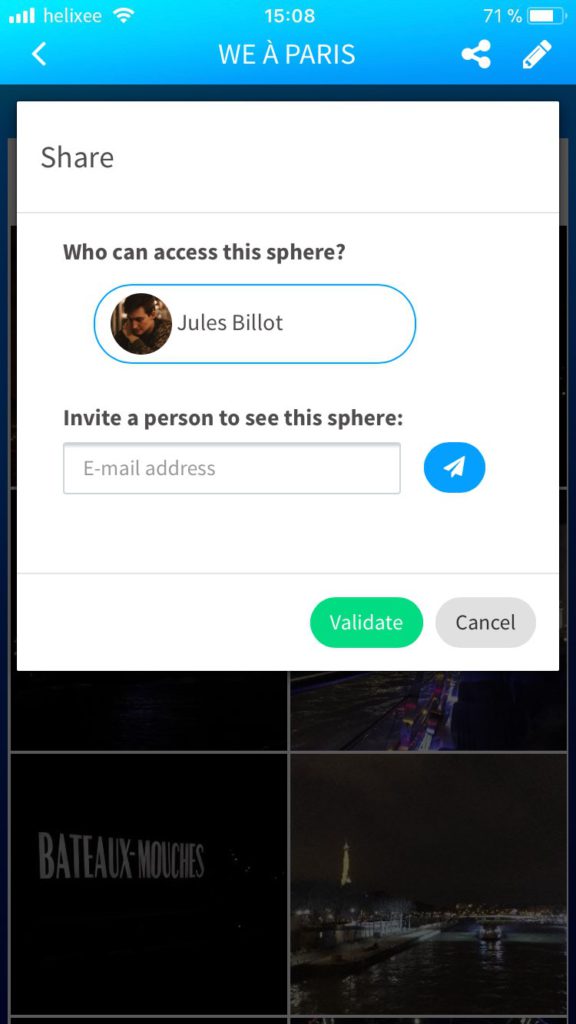
To invite a person to consult your sphere:
- Click on , then My Spheres
- Choose the sphere and open it by clicking on it
- Then click on at the top of your screen
- Choose a person already invited on the helixee by clicking on their name.
- Or add their email address and press Send. Your invitation is sent.
- A green notification will confirm that your invitation has been sent.
To accept an invitation, consult « Accepting an invitation to have access to a helixee ».
To delete a person you invited to your sphere:
- Select the sphere in question.
- Then click on at the top of your screen
- People who have access to your sphere appear in blue.
- To cancel their access to your sphere, press their name, which will then turn white.
- Click on Validate.
- If you want to invite them again, click on their name. It will change to blue again.
4. Consulting the activity feed
What is Activity Feed used for?
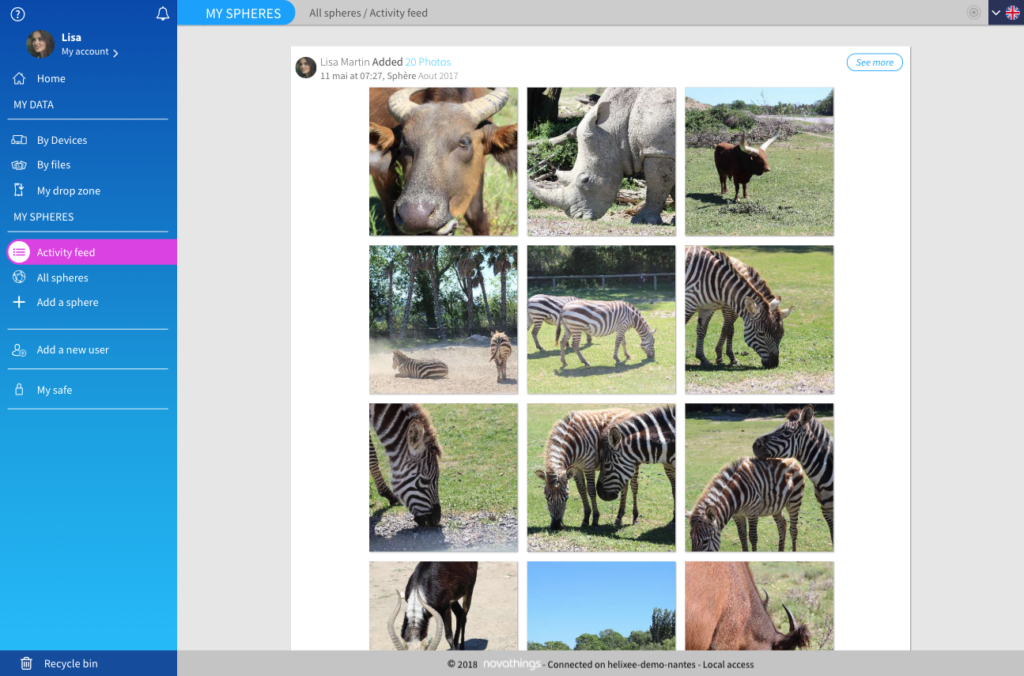
The activity feed allows you to see all the activity in your spheres while seeing, also, the activity in the spheres which were shared with you.
IN THE WEB APPLICATION:
Accessing the Activity feed, simply click on Activity feed in the side menu.
Each block represents an addition to a sphere, if the block contains too many elements, only the first ones will be displayed. To see the other elements click on See all elements.
IN THE MOBILE APPLICATION:
Accessing the to Activity feed
- Open the menu , and click on My spheres.
- Click on Activity feed at the top of the screen.
5. Consulting your spheres
IN THE WEB APPLICATION:
To see the content of the spheres:
- In the side menu click on All spheres.
- Select a sphere.
- Click on See more at the top right of the white block.
- Click the Display button to select different media types.


IN THE MOBILE APPLICATION:
To see the content of the spheres:
- Open the menu, and click on My Spheres
- Click on a sphere to open it.
6. Liking and adding comments to data present in a sphere
IN THE WEB AND MOBILE APPLICATION:
When you are in the heading Activity feed, you have the possibility to like or comment blocks of elements.
To like a photo, you can click on Like
To add a comment, click on Comment, enter your message next to your icon and validate by clicking on Send.
FOR MORE INFORMATION
Today, you can only like and add comment to blocks, but soon you will be able to like and add comments to individual photos!